Showing posts with label Vegetables. Show all posts

2.06.2013

Simple Fried Rice


Happy Wednesday!
These fried rice photos were featured in Miss Sophie's food column in the Savannah Morning News today.  My children absolutely love fried rice (minus the peas and carrots) for breakfast, so whenever I start frying up the bacon, they all do a happy little jig anticipating their favorite dish.  


And of course, my church family, too, loves this dish.
  Click here for a previous shrimp fried rice post and step-by-step photos.    

If you have some left over steamed rice, try this super-simple recipe to make another meal.  


Simple Fried Rice
Serves 8

2 eggs, soft scrambled (Click here for the best scrambled eggs)
4 Tablespoons of vegetable oil or bacon fat
5 cups cooked rice, chilled, clumps broken
3 Tablespoons soy sauce mixed with 3 Tablespoons of chicken broth
4 pieces of cooked bacon, finely chopped, more if cooking for breakfast fried rice
1/2 cup frozen peas
1/2 cup carrots, diced small
1/2 cup green onions, finely diced
1/2 pound of cooked small shrimp
Optional Veggies: 1/2 cups of each cooked bok choy, Nappa cabbage, sliced mushrooms
Optional Meats: Diced ham, chicken, or pork

Cook eggs and set aside.

Heat wok or large non-stick frying pan to smoking point. Add 2 tablespoons of oil or bacon fat if using, roll it around cooking surface to coat. Add rice and stir-fry until rice is hot throughout and free from clumps. Add soy sauce and broth mixture, combining it well. Add bacon and remove rice from wok or pan and set aside in a large bowl.

Add remaining oil/bacon fat to wok/pan. When oil is hot, add carrots first, then frozen peas, then shrimp until ingredients are hot. Add rice back into wok/pan and mix well. Fold in scrambled eggs and diced green onions. Season with salt and pepper to taste.

7.18.2012

Orzo Stuffed Tomatoes

 The heat is really cranking up here in Savannah.  And with fresh vine ripe tomatoes in season, what better way to eat orzo pasta than this?  These photos will accompany Miss Sophie's weekly food column in Savannah Morning News today.  Check it out here.

This simple but flavorful pasta dish is an absolute delight.  Perfect touch to any main meal for casual family dinner or a fancy dinner party.  Hope you'll give it a try. 


These are great to make ahead.  Serve room temperature or slightly warmed.  

Print This Recipe!
Orzo Stuffed Tomatoes 
(Serves 8)
Recipe by Miss Sophie
Used with Permission

8 medium size tomatoes
2 cups orzo, cooked according to package directions
3 tablespoons olive oil, extra for brushing
 ½ teaspoon fresh ground black pepper
1/2 teaspoon salt
1/3 cup fresh basil, chopped
1 tablespoon fresh oregano, chopped
½ cup feta cheese

 Preheat oven to 325 degrees. 

Slice off the tops of each tomato and hollow out using a sharp spoon or melon baller. Chop ½ cup of scooped out tomato and add to orzo. 

Stir oil, pepper, fresh basil and fresh oregano and feta cheese into tomato and orzo mixture. Brush a bit of olive inside each tomato. Season with salt and pepper and place in the oven for 10 minutes. Invert to drain and let sit for 15 or more minutes. 

Stuff with orzo filling. Serve at room temperature or warm in oven for 10 minutes

7.11.2012

Crispy Pea Cakes with Avocado Aioli

 As some of you may know, I have been taking recipe photos for Miss Sophie, who is a weekly food columnist for Savannah Morning Newspaper.  It has been such an enriching experience for me to have a dear friend whom I can freely talk about food/recipe/life/faith with.  As we talk about our next recipe project and/or dream of a cookbook one day, we become like giddy school girls.  
Miss Sophie's article on peas this week is especially good.  Her story is always laced with personal experiences you might hear from your favorite aunt, rocking the heat away on the front porch while sipping on a tall glass of  overly sweetened iced tea.    
 Top: Pink Eyes, Dixie Lees Bottom: Zippers

 Beautiful green mixure is tossed in Panko bread crumbs


Print This Recipe!


Crispy Pea Cakes
Makes 8 small cakes

2 cups cooked peas(black-eyed, Pink-eyed, Zippers, Dixie Lees); left-overs are great for this recipe
1/4 cup red bell pepper, finely diced
1/4 cup onion, finely diced
3 tablespoons canola oil, divided 
1 garlic clove, grated 
1 1/3 cup Panko bread crumbs, divided (use only 1/3 cup for pea cake mixture)
1/2 lime, zested and juiced (Save the other half for aioli)
2 tablespoons cilantro, finely chopped
1/2 teaspoon ground cumin
1/2 teaspoon sea salt
1/4 teaspoon freshly ground pepper
2 eggs

Heat 1 tablespoon of canola oil in a medium-high heat and sauté onion and red bell pepper.  Transfer to a large bowl and cool.  
Drain cooked peas well.  Pat dry with paper towel.  Put the peas in the food processor and pulse 4-5 times in a quick interval.  Do not over process.  You want the mixture to be somewhat chunky but mashed.  Add peas to onion and red bell pepper mixture.  Add garlic, 1/3 cup of Panko, and the remaining ingredients.  Combine well.  Mixture will be a little wet but it will cook and get firm.  
Divide and make into 8 cakes.  Roll the cakes in 1 cup of Panko bread crumbs.  Using the same frying pan, heat 1 tablespoon of oil to medium-high heat and cook 4 cakes until the crust is golden brown and cake is firm about 2-3 minutes on each side.  Add the remaining oil and repeat.  
Serve hot with Avocado aioli.  
Avocado Aioli
1 avocado, ripe but firm, pitted, and peeled, diced
1/3 cup mayonnaise, Hellman's
1/2 lime, zested and juiced
1/2 clove of garlic, grated
1/4 teaspoon salt
1/8 teaspoon freshly ground pepper

Whirl all the ingredients in a food processor until smooth.  Add more salt to taste. Refrigerate until needed.  

5.25.2012

Simple Garlic Pickles


It's about time I share this super garlic pickle recipe with you.  I tried to post it before, but as you know, pickle are not so photogenic.  My point & shoot camera plus my lack of photography skill a year or two ago didn't help much to improve the look either.  But now, a proper introduction is in order for these fabulous (yes, pickles can be quite fabulous) garlicky pickles with a delightful kick.

Drain all the pickle juice.  After slicing the pickles, put them back in the jar, then add Tabasco sauce, garlic cloves, and sugar.  Easy, wasn't it?  After 2-3 days in the refrigerator, it is ready to serve.  


Simple Garlic Pickles 

1 jar    one gallon, whole kosher dill pickles, regular sour kind
1/2 C  Tabasco sauce
8-10   whole garlic cloves, peeled
3 C     granulated Sugar

Completely drain and discard all the pickle juice. Cut pickles into 1-inch slices. Put sliced pickles back into the empty jar then add the remaining ingredients.

Screw on the jar lid very TIGHTLY. Turn jar upside down and refrigerate; pickle juice will exude and dissolve the sugar. Just incase the pickle juice leaks, put a small pan under.  

Refrigerate pickles 2-3 days, turning the jar once or twice a day.  Now it's ready to serve. 

Keeps crunchy for about 2-3 weeks. 

3.05.2012

Eat Your Veggies


As a little girl in Korea, I ate lots of fresh vegetables, mostly because it was more abundant than meat or fish. The vegetable sides prepared Korean style are crunchy and flavorful, usually quickly blanched in hot water, cooled, then seasoned or sautéed. I remember the shock my young palate went through when I first tasted canned peas: soft and mushy, with a strange flavor that still lingers in my memory. Since my first unpleasant encounter with canned peas as a little girl, I carefully avoided eating and serving canned vegetables since then.

Though fresh vegetables are always preferred, when serving a large crowd on a low budget and a small kitchen staff, frozen vegetables are wonderful option .
Sautéed frozen peas with onions (or shallots if you want to get fancy).


Frozen whole green beans can be sautéed with canola oil on a hot griddle. Have a mixture of salt, pepper, and granulated garlic ready. Season to taste.


Frozen broccoli.

Quick stir frying is the key with all the frozen vegetables (coated with a bit of oil and seasoning). The inside of the veggies will be still cold, which is fine since you will finish heating in the oven.


Frozen broccoli exudes a lot of water. After a quick sauté, put broccoli in a large colander and let water let drain for 5 minutes before putting them in a steam pan.


Sautéed Frozen Vegetable Options

Green Beans
Peas
Broccoli

Optional: diced and sautéed onions or shallots add great flavor!

Equal part of salt, ground pepper, and granulated garlic
Canola oil for sautéing

Special Equipment: 4-burner griddle

Heat griddle high heat, until smoking point. Drizzle canola oil to coat lightly. Put frozen veggie of your choice, sprinkle salt/pepper/granulated garlic mixture to taste. Coat and quickly sauté veggies for 2-3 minutes so the edges of the vegetables are browned. Transfer into a full-size steam pan. Stir vegetables and season with more salt and pepper as needed. Cover with foil until ready to heat.

Preheat oven to 350 deg. F

1 hour before serving, heat the vegetables in oven. Depending on the amount of vegetables in the steam pan, 25-45 minutes until just heated through. Stir half way through cooking time. For colorful vegetable medley as pictured above, add sautéed onions and tri-color peppers at half way point and finish heating.

To serve vegetable medley for 300 (portioned and served)

28 lbs of frozen broccoli
12 lbs of frozen green beans
6 large white onions, julienne
18 tri-color peppers, cored & julienne
To add flavor, I added 2 cups of fresh chopped Thai Basil right before serving
Canola Oil
Equal parts of salt, pepper, granulated garlic (not garlic powder) to taste

7.19.2011

Summer Gazpacho

One of my best friends went through a routine surgery several weeks ago, but something terribly went wrong and she slipped into coma for 9 days. It was the most excruciating and agonizing days for her family and all of us who know and love her dearly.

But God heard our cries and answered our fervent prayers and woke my friend up. And we all cried again but with joy and gratitude this time. Several days after waking up, my dear friend was able to eat diced foods and I was so thankful to be able to make something she can enjoy!

Instead of savory tomato soup, I hoped she could taste my love and care. And family and friends are all rejoicing at the great progress she is making each day. Thank You, Lord......

Red bell peppers, cucumber, and ripe tomatoes are coarsely chopped in a food processor. Leave them chunky for texture. I reduced the garlic and onion for my friend.

3 cups of tomato juice....

And just a small dollop of chili garlic sauce to brighten up the flavor.


Print This Recipe!

Summer Gazpacho
Makes 4-6 servings
Adapted from Ina Garten's Recipe

1 hothouse cucumber, halved and seeded, but not peeled
1 red bell peppers, cored and seeded
4 plum tomatoes
1/4 red onion, more if desired
1 garlic clove, minced, more if desired
23 ounces tomato juice (3 cups)
1/4 cup white wine vinegar
1/4 cup good olive oil
1/2 tablespoon kosher salt
1 teaspoon or more of Garlic chili sauce
1 teaspoons freshly ground black pepper

Roughly chop the cucumbers, bell peppers, tomatoes, and red onions into 1-inch cubes. Put each vegetable separately into a food processor fitted with a steel blade and pulse until it is coarsely chopped. Do not overprocess!

After each vegetable is processed, combine them in a large bowl and add the garlic, tomato juice, vinegar, olive oil, garlic chili sauce, salt, and pepper. Mix well and chill before serving. The longer gazpacho sits, the more the flavors develop.

Garnish with sliced cucumbers and serve.

7.08.2011

Savannah Tomato Sandwiches


In past 16 years of catering parties and events, I can't tell you how many of these delectable sandwiches I've made; thousands of them? Not sure. But one thing for sure, they are delicious! Simple and so Southern, and they'll brighten up any gathering.


Using a biscuit cutter, about the same diameter as the tomatoes, cut bread rounds. You can use white, wheat, rye, or any types of bread you would like. I usually use white and wheat for color variations. These can be done a few weeks ahead. Put a plastic wrap between each layer to avoid bread rounds sticking, cover well and freeze. **Use the bread remnants for fresh bread crumbs, bread pudding, or my chickens love these as snacks!


A proper Southern lady would never get caught having tomato skin stuck to their teeth, so we are going to take a few extra minutes to take the skins off the tomatoes.


Bring water to a rolling boil in a large pot. Prepare a large bowl of ice water. Using a paring knife, score "x" on the smooth side of tomatoes. Gently drop the tomatoes in boiling water, be careful of splashing! Blanch tomatoes for 30 seconds or so until you see tomato skin begin to peel. Do not over blanch.

Immediately plunge tomatoes in ice water to stop from cooking. Do you see how the skins are cracked and ready for peeling? The skins should come right off or use the paring knife to peel.


Slice the tomatoes and let drain on several layers of paper towels. Cover and store in fridge until ready to assemble (can be prepped a day head).


Keep bread rounds frozen until ready to assemble. Do not thaw; it is much easier to handle the rounds when assembling. Use extra paper towels and dab extra tomato juice before assembling sandwiches. Plastic storage bag can be used as a piping bag to put sauce on quickly.

Tomato Sandwiches can be made up to three hours ahead. Cover well with plastic wrap so bread rounds won't dry out. So beautiful and delicious!


Savannah Tomato Sandwiches with Basil Aioli
Yields 16 Sandwiches

4 Medium size vine ripe tomatoes
16 Slices of white bread
16 Slices of wheat bread (or other bread slices of your choice)
1 cup Basil Aioli Sauce (see recipe below)

1. Using a biscuit cutter, about the same diameter as the tomatoes, cut bread rounds. Put plastic wrap between layers and store in freezer until ready to assemble.

2. Bring water to a rolling boil in a large pot. Prepare a large bowl of ice water, set it aside. Using a paring knife, score "x" on the smooth side of tomatoes. Gently put tomatoes in boiling water; be careful of splashing hot water! Blanch tomatoes for 30 seconds or so until you see tomato skin begin to peel. Do not over blanch.

3. Using a slotted spoon, take tomatoes out and immediately plunge tomatoes in ice water to stop from cooking. Peel the skin using a paring knife, if necessary.

4. Slice the tomatoes (one tomato yields about 4 nice, thick slices) and let drain on several layers of paper towels. Cover and store in fridge until ready to assemble (can be prepped a day head).

5. When ready to assemble, lay frozen bread rounds, spoon or pipe sauce on, pat excess juice out of tomato slices with paper towels before laying on top of sauce, then top it with second bread round. Finish assembling and cover well with plastic until serving time.


Basil Aioli Sauce:

3/4 cup mayonnaise
1/4 cup sour cream (or softened cream cheese)
1/4 cup finely chopped fresh basil
1 tablespoon fresh lemon juice
1 tablespoon prepared horseradish
1 teaspoon grated garlic
1 teaspoon grated lemon peel
1/8 teaspoon salt, or more

Combine all ingredients in a small bowl, season well with salt. Set aside or refrigerate in a plastic storage bag until ready to assemble sandwiches.

Make Ahead Tips:

Up to two weeks prior: Cut bread rounds, cover well and freeze

Up to 3 days prior: Make Basil Aioli, store in zip lock bag, refrigerate

1 Day before: blanch tomatoes, peel skins, slice, cover well and store in refrigerator.

4 hours prior to event: begin assembling sandwiches, cover well with plastic wrap; can be stored in refrigerator or room temperature.

6.15.2011

Heirloom Tomato Salad


When I saw these heirloom cherry tomatoes at Davis Produce early this morning, I couldn't help myself but to snatch these up! Instead of making a typical garden salad as a side dish for Wednesday noon service lunch, I was thrilled to have these fresh organic, heirloom tomatoes to make the side instead.
Various colors and shapes made my heart happy.

No fancy ingredients necessary. Just some fresh basil, olive oil, vinegar, and garlic will do.

To keep basil leaves from bruising and turning color, chiffonade the leaves. Click here for a quick tutorial.
Simple, light and delicious side for this hot summer.

It was a perfect accompaniment with salmon wraps served at lunch today!


Heirloom Tomato Salad
Serves 2-3

3 tablespoons Extra Virgin Olive Oil
1 1/2 tablespoons Red wine, or pomegranate vinegar
1/2 teaspoon Dried tarragon; (or 2 teaspoons fresh, chopped)
2 teaspoons Fresh Basil, chiffonade, or thinly sliced
1 teaspoon Garlic; minced or pressed
1 pound Heirloom cherry tomatoes, halved
pinch of sugar
salt and freshly ground pepper to taste

Feta cheese optional

In a small mixing bowl, whisk the olive oil, vinegar, garlic, a pinch of sugar, and dried tarragon until incorporated. Season the vinaigrette well with salt and pepper. Toss gently halved cherry tomatoes and fresh basil leaves. Let sit in room temperature for 15-30 minutes for flavors meld.

5.07.2011

Meyer Lemon Spaghetti with Asparagus

I am honored to have Jenna @ Eat, Live, Run as my first guest on this blog! A graduate of Le Cordon Bleu, her recipes are fantastic and simplified for home cooks. She is a contributing writer for Health.com and Tasty Kitchen, and she has a book about her culinary school experiences and favorite recipes that will be coming out next year.

So....here is Jenna. (And boy are you in for a treat!)


Hi everyone!

This is Jenna from Eat Live Run and I’m so excited to be guest posting for my friend Kay today. My parents go to the same church as Kay, and she has served as both a blessing and encouragement to me in the past months that I’ve come to know her.

I’m thrilled to be posting here today with one of my favorite light summer pasta dishes---meyer lemon spaghetti with asparagus!


If you can’t find meyer lemons, no big deal, you can totally just use regular lemons here. But be sure to taste while you cook because regular lemons are a tad more tart than their sweet meyer cousins.


This is one of those perfect weeknight “throw together” meals when it’s too hot to be standing in front of the stove and all you want to do is relax with your family. Opt for the largest, freshest asparagus you can find at your local farmer’s market or grocery store for this. You won’t regret it!


Meyer Lemon Spaghetti with Asparagus

serves 4

Print this recipe!

Ingredients:
8 oz linguine pasta
2 T extra virgin olive oil
3 cloves garlic, minced
1/4-1/2 tsp red pepper flakes (depending on how spicy you like it!)
juice of two large meyer lemons to equal about 1/2 cup
1 bunch asparagus, sliced
1/2 cup chopped sundried tomatoes
pinch of salt and pepper
1/2 cup freshly grated Parmesan cheese
fresh parsley for serving

Directions:

Cook the pasta in boiling salted water until done. When pasta is done, remove noodles with a slotted spoon, reserving boiling water. Blanch asparagus in water for thirty seconds, until bright green. Drain and reserve 1/2 cup of cooking liquid.
Heat the olive oil in a pan over medium heat. Add the garlic and red pepper flakes, and saute for thirty seconds. Remove from the heat. Add the pasta, sundried tomatoes and asparagus to the pan and toss everything together. Pour in the lemon juice along with additional cooking water if the dish seems too dry. Season with salt and pepper.
Add the Parmesan cheese and fresh chopped parsley.

Time:

20 minutes


12.20.2010

Stuffed Tomatoes with Parmesan and Basil


I know it's wintertime and good tomatoes are hard to find. But, I couldn't resist making these for the annual CERF (Coastal Empire Reformed Fellowship) Christmas dinner party which was held in church fellowship hall a few weeks ago.

These look beautiful on a Christmas buffet table and have a fresh flavor with basil, garlic and freshly grated Parmesan.

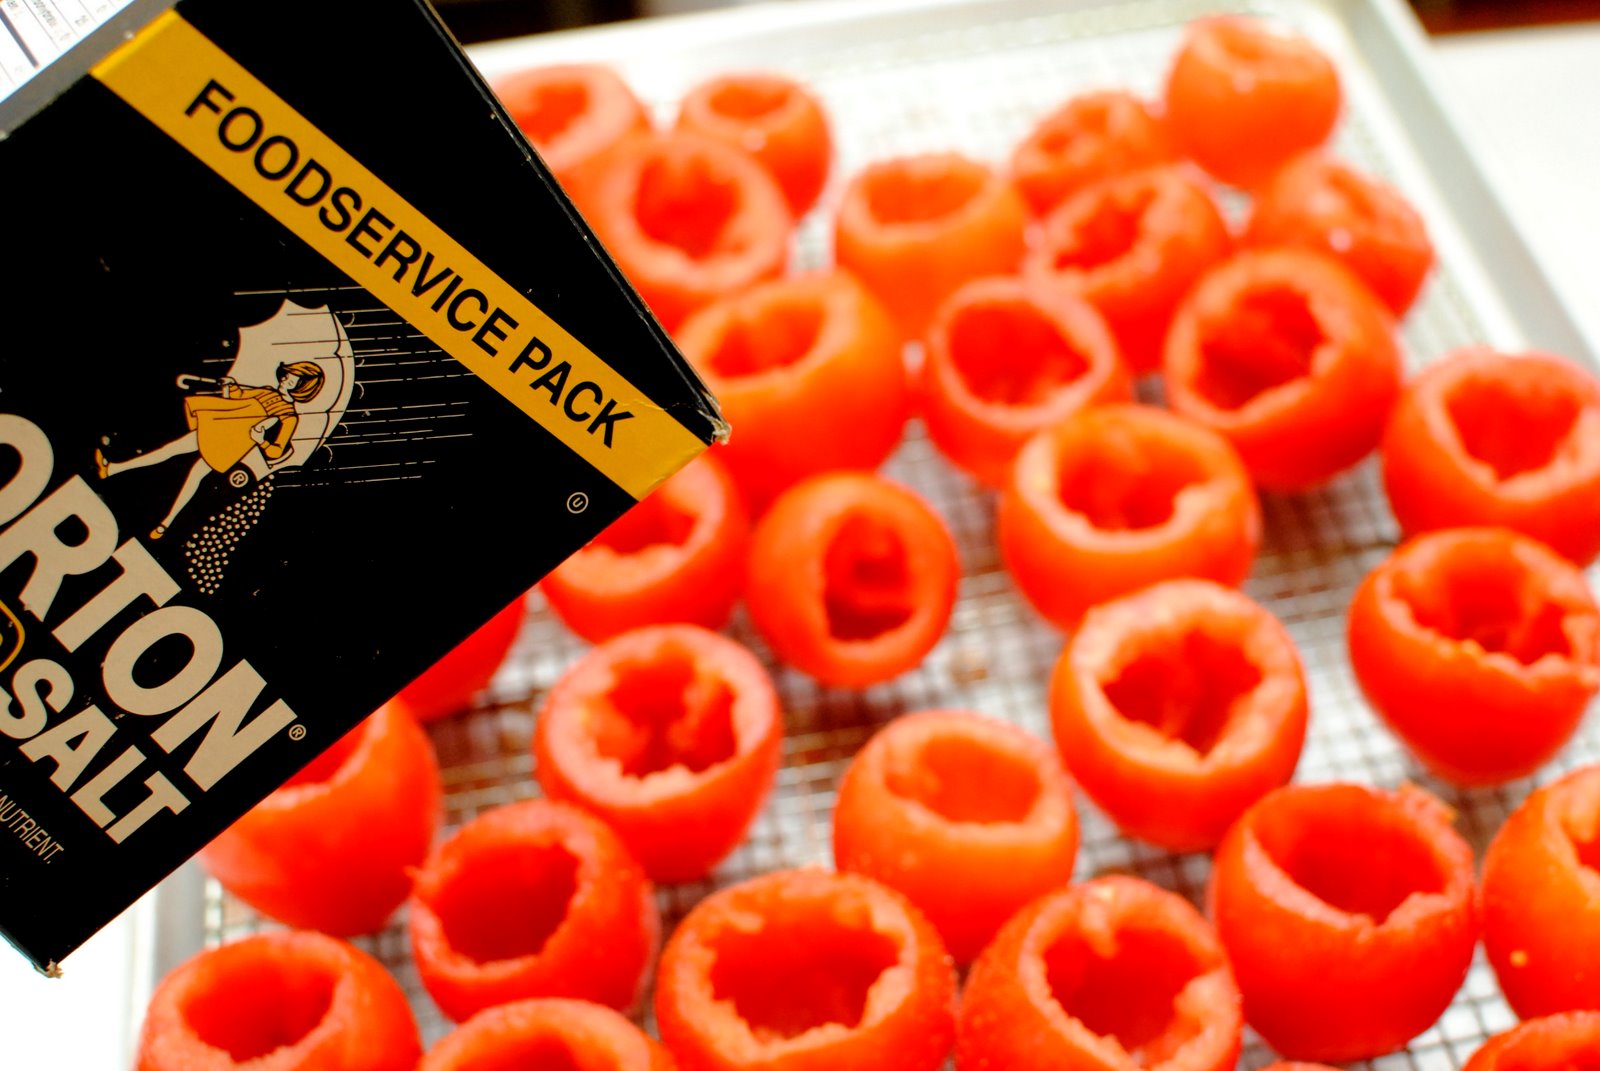
Slice off 1/8 inch of the stem end. Core and seed the tomatoes. Lightly sprinkle with salt.

Turn the tomatoes with cut side down over a cooling rack and let stand for 30 minutes. This will ensure that the extra juice will be extracted so the bread stuffing won't get soggy.

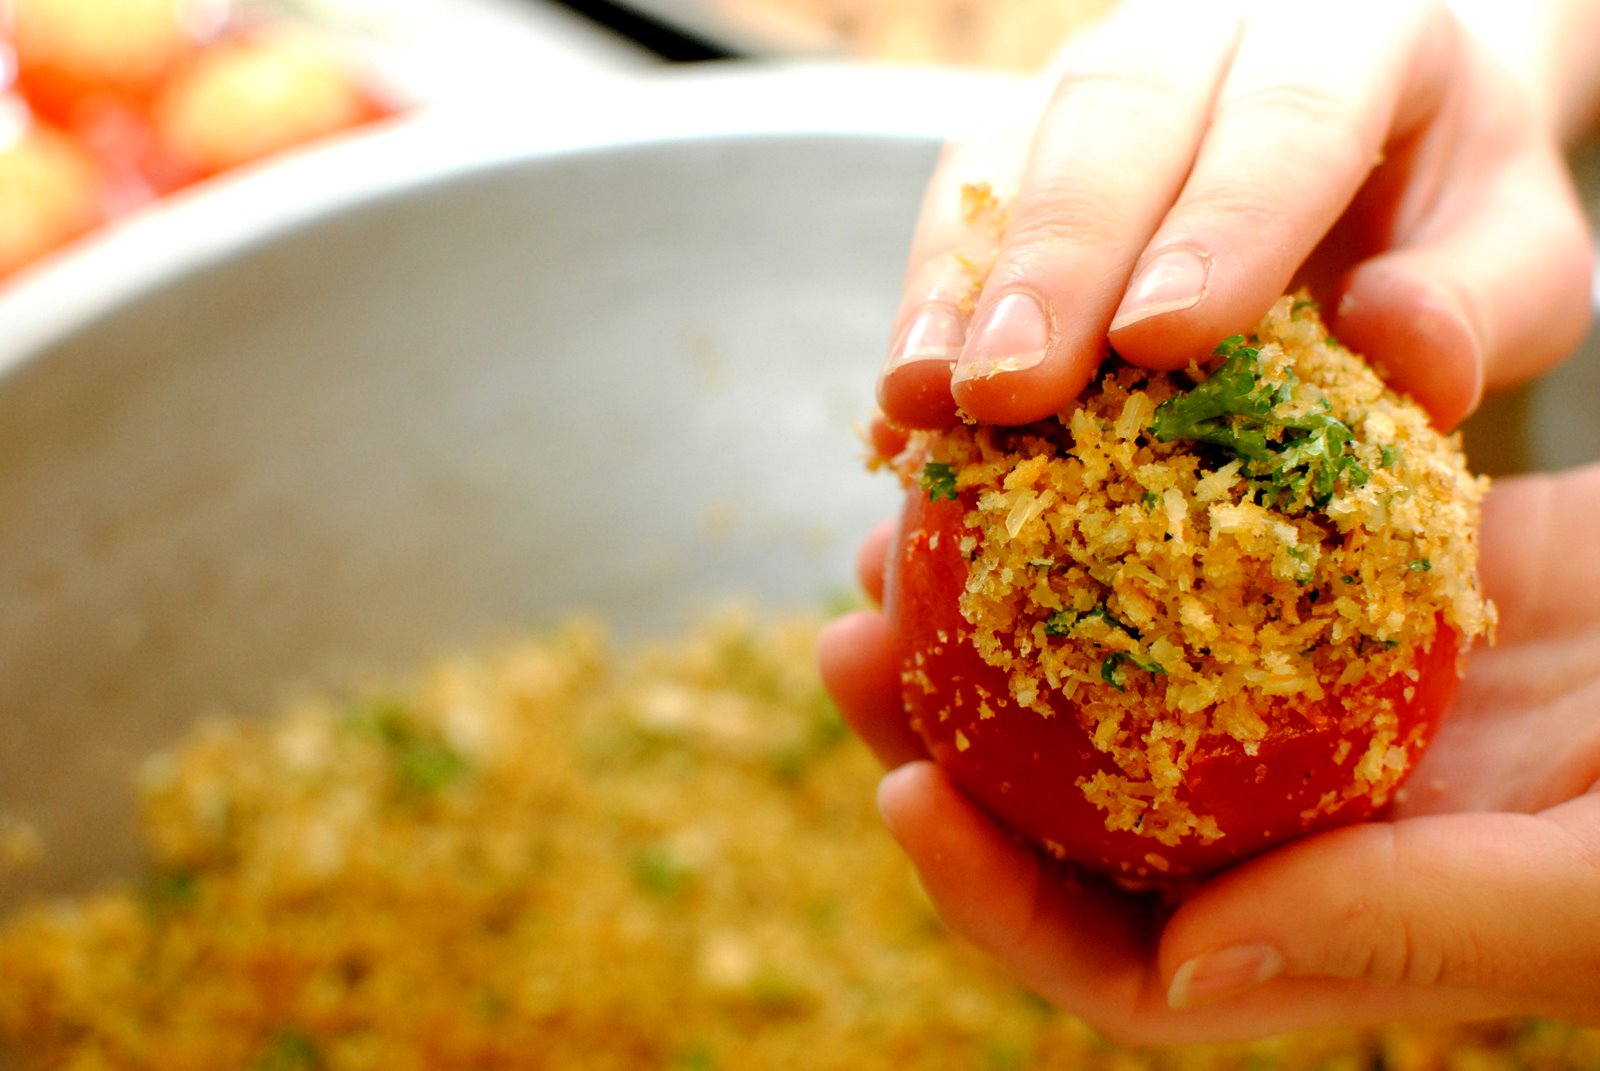
Mix Panko bread crumbs, basil, garlic, and Parmesan cheese and toss with olive oil. Or add any herb mixture you'd like!
Mound stuffing into tomatoes. Don't press down too hard. Sprinkle a bit of cheese and bake.

There you have it! A flavorful side that will brighten up your table.


Stuffed Tomatoes with Parmesan and Basil
Adapted from Cook's Illustrated

6 firm, vine-ripe tomatoes (about 6 ounces each), 1/8 inch sliced off stem end, cored, and seeded
1 teaspoon kosher salt or 1/2 teaspoon of table salt
3/4 cup Panko bread crumbs
3 tablespoons olive oil, divided
1 teaspoon olive oil, for brushing
1/3 cup grated Parmesan cheese (about 1 1/2 ounces), extra for topping
1/3 cup shredded fresh basil leaves
2 medium cloves garlic , minced (about 2 teaspoons)
Ground black pepper

1. Sprinkle inside of each tomato with salt and place upside down on a wire rack; let stand to remove excess moisture, about 30 minutes.

2. Meanwhile, toss Panko bread crumbs with 1 tablespoon olive oil, Parmesan, basil, garlic, and pepper to taste in small bowl; set aside. Adjust oven rack to upper-middle position and heat oven to 375 degrees, line bottom of 9 by 13-inch baking dish with foil.

3. Roll up several sheets of paper towels and pat inside of each tomato dry. Arrange tomatoes in single layer in baking dish. Brush top cut edges of tomatoes with 1 teaspoon oil. Mound stuffing into tomatoes (about 1/4 cup per tomato); drizzle with remaining 2 tablespoons oil, sprinkle some cheese on top. Bake until tops are golden brown and crisp, about 20 minutes. Serve immediately.


11.02.2010

Grilled Zucchini (The Spirit of Food)


Kirstin Vander Giessen-Reitsma is the editor of catapult magazine, a bi-weekly online publication of *culture is not optional. *cino’s work also includes conferences, the quarterly print road journal and a growing series of topical books that includes Eat Well: A Food Road Map and Do Justice: A Justice Road Map.

Kirstin and her husband Rob help run World Fare, a fair trade store in Three Rivers, Michigan, which is the home of *cino's Imagining Space project at the historic Huss School. They also share a position at Calvin College doing research, education and programming around discernment and popular culture. Kirstin refreshes her body and mind by gardening, biking, singing, reading and cooking.

You will be delighted with simple goodness of this grilled zucchini. I used the aged balsamic vinegar from Low Country Gourmet Foods in Savannah to give slightly sweet and tangy flavor.


Zucchini spears are tossed with simple marinade for 30 minutes.


Grill on medium-high until edges are slightly blackened.


Grilled Zucchini

Recipe by Kirstin Vander Giessen-Reitsma
Used by permission of Wipf and Stock Publishers

Serves 6

6 medium zucchini
1/4 cup olive oil
1/4 cup balsamic vinegar

Cut each zucchini lengthwise into about 6 spears each.

Place zucchini, oil, and vinegar in a flat dish, toss to coat, and let sit for at least 30 minutes.

In the meantime, heat a grill to medium-high. Place zucchini spears on the grill and turn until they're slightly blackened on the edges.

Enjoy hot off the grill or chill to eat plain or in salads.

Personal Note: You can add 2 tablespoon of raw honey and 1 tablespoon of dijon mustard for slight sweetness.

Recipe 6 of 31