Showing posts with label Sandwiches. Show all posts

10.22.2012

Hobbes' Favorite Tuna Salad

 Bill Watterson

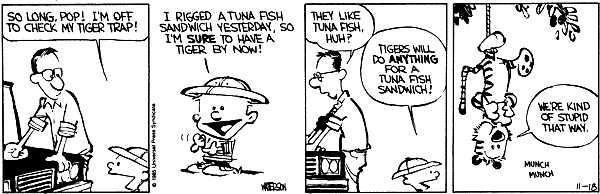
 My youngest loves a good tuna salad sandwich.  And he loves to read Calvin and Hobbes.  And being the youngest of four, he gets whatever he wants.  At least that's what my three older ones accuse me of.  
So when he begged for a stuffed Hobbes, I went searching online.  OK, maybe the older ones are right.  

Quickly I found out that a stuffed Hobbes can't be purchased anywhere, because Mr. Bill Watterson never liked the idea of commercializing his work.   So if you want to own a stuffed Hobbes, you gotta make it yourself.  

And here I found a great free pattern available online. Thanks to super creative Seamster, the instructions, complete with helpful step-by-step photos, were super-easy to follow, even for this novice sewer.  
The hardest part was hand sewing Hobbes' way-too-many stripes, but my youngest "hoorayed" and said things like, "Mom, you are the best sewer in the world!"  every time a stripe was sewn on.  With this kind of encouragement, I could have sewn the moon for this kid.  

Just like the real Calvin and Hobbes, these two are inseparable lately.  After only a few weeks,  Hobbes' white muzzle is already grey-brown, and his limbs are beginning to detach from being carried around so much.  And watching them share this tuna salad sandwich for lunch? Priceless.  


Hobbes' Favorite Tuna Salad 
Makes 2 generous sandwiches
Recipe inspired from Cook's Country

2 (5 oz) cans solid white albacore tuna, packed in water
2 Tablespoon grated onion (great way to hide onion from kids)
1 Table Olive oil
1 teaspoon fresh lemon juice
1/4 Cup Hellmann's Mayonnaise
Salt and Pepper to taste

Optional ingredients: finely chopped celery, hard boiled eggs, fresh dill, or anything else that catches your fancy.

4 slices of bread
2 pieces of lettuce leaves  

Open two cans of tuna and drain water completely.  Transfer tuna into a medium size bowl and pat dry with a few sheets of paper towels.  

In a small microwave safe bowl, combine grated onion and olive oil and heat for 45 seconds.  Cool.  

Using a fork, toss onion mixture with tuna and add lemon juice and mayo.  Add any optional ingredients if using. Season well with salt and pepper.  

Assemble the sandwiches or use it to top a bed of greens.  


Note: Here is the link to canned tuna drainer that Pateberry mentioned in her comment.  Thanks Pateberry for this tip!


9.17.2012

Girls' Night Turkey Burger Recipe and Book Giveaway!


Good Monday morning!  It's September and the heat blanket which has been hovering Savannah for last three months has lifted.   And everyone, including my dog Brie is happy to be breathing crisp, cool air.  Without the oppressive Southern heat, our steps have springs and days are much more enjoyable to do school, work, and play. I love Savannah in September!

And to add to this excitement, here is my first giveaway on my blog.  I'm giving away three autographed copies of White Jacket Required-Culinary Coming of Age Story written by my very special friend, Jenna.  She is an amazing chef/writer of Eat, Live, Run, incredibly beautiful inside and out, and a daughter of my most favorite couple at my church!  

To learn more about Jenna, please visit http://www.eatliverun.com, and follow her on Facebook and Twitter


 And since Jenna will be coming through Savannah for her book signing tour in October,  Miss Sophie and I are throwing a big party to celebrate her and her new book.  So if you are in the area, please come and join us!  

Here is one of Jenna's mouth watering recipes in the new book,  Girls' Night Turkey Burgers.  These were served at our church's Wednesday Noon Service lunch, (topped with Pepperjack cheese and tomato-caper salsa) and everyone LOVED them!  


To enter to win a copy of Jenna's new, autographed book,  all you have to do is leave a comment on this post by answering this question.
I absolutely love Fall and all the bounteous food that comes from it.  

What is your favorite Fall food? 
Sweet potatoes? Turkey? Pot Pies?

  • Contest ends Tuesday, September 25, 2012 at midnight EST
  • One entry per person, please. 
  • Winners must have a US mailing address. 
  • Three winners will be chosen by Random.org and notified by email.


Girls' Night Turkey Burgers with Spicy Sweet Potato Fries
Reprinted with permission from White Jacket Required: A Culinary Coming-of-Age Story © 2012 by Jenna Weber, Sterling Epicure, an imprint of Sterling Publishing Co., Inc.


Serves 2
Old Bay seasoning is the secret ingredient in these easy and healthy turkey burgers. I like to serve mine with melted cheddar or pepperjack cheese on top. The spicy sweet potato fries (baked of course!) complete the meal.


1 large sweet potato, peeled and sliced into matchstick-thin slices 
Sea salt

1/8 teaspoon cayenne pepper, or to taste 
Cooking oil spray

½ pound lean ground turkey 
1 egg, lightly beaten
½ teaspoon sea salt
1 teaspoon Old Bay seasoning 
1 red bell pepper, chopped
2 slices cheddar or pepperjack cheese (optional but delicious) 
2 hamburger buns, toasted (preferably whole wheat) 
Ketchup or hot sauce


Preheat the oven to 400°F and grease a cookie sheet.

Arrange the sweet potato slices in one layer on the sheet and sprinkle with sea salt and cayenne. Spray fries with vegetable oil spray and bake for 30 minutes, turning each fry over midway through baking.

In a large bowl, combine the turkey, egg, salt, Old Bay seasoning, and bell pepper. Mix thoroughly either with your hands or with a spoon until everything comes together and is combined well. Form into two even patties.

Cook the burgers in a nonstick skillet over moderate heat until cooked through, about 7 minutes per side. Top each with a slice of cheese and cook two minutes longer, allowing the cheese to melt.

Remove from heat and serve on toasted buns, topped with desired accompaniments. Serve with hot sweet potato fries and plenty of ketchup and hot sauce.

The above is an excerpt from the book White Jacket Required: A Culinary Coming-of-Age Story by Jenna Weber. The above excerpt is a digitally scanned reproduction of text from print. Although this excerpt has been proofread, occasional errors may appear due to the scanning process. Please refer to the finished book for accuracy.

Reprinted with permission from White Jacket Required: A Culinary Coming-of-Age Story © 2012 by Jenna Weber, Sterling Epicure, an imprint of Sterling Publishing Co., Inc.


Jenna Weber
, author of White Jacket Required: A Culinary Coming-of-Age Story, is the author of the highly successful food blog Eat, Live, Run. In 2007, she attended Le Cordon Bleu College of Culinary Arts in Orlando, Florida. White Jacket Required is her first book. She lives in San Francisco, California. Go to www.eatliverun.com for an up-to-the-minute look at Weber's world of food.

For large volume cooking:  10 lbs of ground turkey was used to yield about 32- 5 oz burgers.


7.23.2012

Mock Muffaletta Sandwich & Olive Salad

I know I broke all the rules with this one.  No muffaletta bread, instead it was the sour dough.  And I hear it's considered blasphemy to heat the sandwich.  But we did, all of them.  And the Wednesday lunch crowd went wild!  These hearty, delectable sandwiches will be on a very short rotation on our Wednesday lunch menu for sure.    

Slices of ham, provolone cheese, salami, mozzarella, and then da bomb, the olive salad!  Oh, my.  

 Why didn't I make this sooner?  The briny and flavorful olives melded with roasted peppers and artichoke hearts just did it for me.  I'm forever changed and will love this sandwich for rest of my life.  The End.   


Print This Recipe!


Mock Muffaletta Sandwich & Olive Salad
Makes 4 Hearty Sandwiches


Olive Salad  

  • 1 cup pitted green olives , chopped
  • 1 cup pitted Kalamata olives, chopped
  • 1 tablespoon tiny capers
  • 1/3 cup diced roasted red bell pepper
  • 1/3 cup roasted artichoke heart coarsely chopped
  • 2 tablespoons chopped flat-leaf parsley
  • 2 teaspoons finely minced garlic
  • 2 tablespoons red-wine vinegar
  • 2 tablespoons olive oil
  • pepper, to taste

Sandwich:
  • 8 slices of sour dough bread
  • 16 thin slices of ham
  • 12 slices of salami
  • 8 slices of provolone cheese
  • 1 cup of freshly shredded mozzarella
  • 4 tablespoon unsalted butter, softened

For olive salad, combine all the ingredients in a medium bowl, season with pepper.  

Preheat a stove top griddle or a large frying pan to medium heat. 

For sandwich, on a slice of sour dough, divide the sandwich ingredients and liberally spread the olive salad.  Top it with the second slice of bread.  Makes four large sandwiches.   Butter the outer layer of the sour dough slices and heat the sandwich through until bread is toasty brown and cheese begin to melt.  Slice diagonally in half and serve immediately.   


5.02.2012

That's a Wrap! with Miss Sophie


Miss Sophie has some fabulous wrap recipes this week on Savannah Morning News.  And while taking photos, I had about six of these babies, may be seven.  One of the greatest benefits of taking food photos is that I get to eat the subject when done.

The sandwich wrap has become the way to eat a sandwich. This phenomena isn’t really new, the name just is. For years we’ve been eating tacos, burritos, crepes, gyros and egg rolls, all of which are wraps.   Click here to read more.......

4.18.2012

Cherry & Pineapple Tea Sandwiches with Miss Sophie


It's been a great fun time photographing Miss Sophie's recipes each week. Have you ever heard of Cherry & Pineapple tea sandwiches? Cream cheese filling on white bread! OK, not the usual pick for those who are health conscience, but isn't this ol' timey, Southern recipe so charming? And I just couldn't resist these beautifully pink-filled sandwiches to share with you.

Enjoy Miss Sophie's beautiful write up on her personal story and tea sandwich recipes.

I look back often and reflect on how certain situations and certain people have shaped and molded the person I am today. My childhood and teenage years I was surrounded by a loving family of great cooks, and Godly men and women who taught me about life and gave me the building blocks I needed to go out into the world.....click here to read more.


Cherry & Pineapple Tea Sandwiches

Makes about 1 1/2 cups of filling

8 ounces of cream cheese, softened
½ cup crushed pineapple, drained well and patted dry with paper towel
¼ cup maraschino cherries, drained well, patted dry and chopped
2 tablespoons powdered sugar
1/2 teaspoon salt

Softened butter

White Bread

In a medium bowl, whip cream cheese, salt and powdered sugar until fluffy. Fold in pineapple & cherries.

Remove crust from bread. Lightly butter one side of bread.  Spread cream cheese spread on buttered side, then top it with the buttered side down.

*Spreading butter on your bread before spreading the filling forms a protective barrier between the filling and the bread and keeps the bread from getting soggy.

9.22.2011

Easy Shrimp Salad


Here is a super easy shrimp salad which I serve at Wednesday noon service lunch when I am pressing for time. Though I am very exact with measuring baking ingredients, this is one of those simple recipes that you can "throw together" yet yield great result.


Here is what I call our "house dry rub". We keep this on hand in our church kitchen to flavor and season just about everything! I know it requires a few more than a handful ingredients , but it is worth the effort and you will have great tasting rub.


We use peeled 41-50 count shrimp (number of shrimp per pound). This comes in a frozen 5 pound block (check your local seafood stores). To thaw the frozen shrimp, run cold water over the shrimp in a colander. Drain well and pat dry with paper towels, and toss the dry rub and gently mix.


You know how I love this 4-burner griddle. Get the griddle super hot, drizzle some oil, then saute the shrimp. Don't over crowd the griddle, lest the shrimp will steam. Quick saute in small batches is the best.


When shrimp is cooked, quickly spread them on a large sheet pan and cool. A little dab of Hellmann's mayo, sour cream, and salt and pepper is all you need for this scrumptious shrimp salad.


Serve it on a garden salad or on a croissant.


Easy Shrimp Salad
Serves 2-4

1 lb of peeled raw shrimp (41-50 count)
2 teaspoon of dry rub (click here for recipe) or your favorite dry rub
1 tablespoon canola or vegetable oil
1/4 cup of Hellmann's Mayo
2 tablespoon sour cream
1/4 cup finely diced celery (optional)
Salt and Pepper to taste

Toss together raw shrimp and dry rub. Heat a large frying pan to high until smoking point. Drizzle oil and coat the pan/griddle. Quickly saute the shrimp until cooked, 1-2 minutes. Do not over crowd the pan. Cool cooked shrimp completely. Add in a large bowl mayo, sour cream, shrimp, celery (if using). Season with salt and pepper to taste.

Serve on a bed of salad or on croissants.


Note: 10 lbs of shrimp will yield about 30 servings

7.08.2011

Savannah Tomato Sandwiches


In past 16 years of catering parties and events, I can't tell you how many of these delectable sandwiches I've made; thousands of them? Not sure. But one thing for sure, they are delicious! Simple and so Southern, and they'll brighten up any gathering.


Using a biscuit cutter, about the same diameter as the tomatoes, cut bread rounds. You can use white, wheat, rye, or any types of bread you would like. I usually use white and wheat for color variations. These can be done a few weeks ahead. Put a plastic wrap between each layer to avoid bread rounds sticking, cover well and freeze. **Use the bread remnants for fresh bread crumbs, bread pudding, or my chickens love these as snacks!


A proper Southern lady would never get caught having tomato skin stuck to their teeth, so we are going to take a few extra minutes to take the skins off the tomatoes.


Bring water to a rolling boil in a large pot. Prepare a large bowl of ice water. Using a paring knife, score "x" on the smooth side of tomatoes. Gently drop the tomatoes in boiling water, be careful of splashing! Blanch tomatoes for 30 seconds or so until you see tomato skin begin to peel. Do not over blanch.

Immediately plunge tomatoes in ice water to stop from cooking. Do you see how the skins are cracked and ready for peeling? The skins should come right off or use the paring knife to peel.


Slice the tomatoes and let drain on several layers of paper towels. Cover and store in fridge until ready to assemble (can be prepped a day head).


Keep bread rounds frozen until ready to assemble. Do not thaw; it is much easier to handle the rounds when assembling. Use extra paper towels and dab extra tomato juice before assembling sandwiches. Plastic storage bag can be used as a piping bag to put sauce on quickly.

Tomato Sandwiches can be made up to three hours ahead. Cover well with plastic wrap so bread rounds won't dry out. So beautiful and delicious!


Savannah Tomato Sandwiches with Basil Aioli
Yields 16 Sandwiches

4 Medium size vine ripe tomatoes
16 Slices of white bread
16 Slices of wheat bread (or other bread slices of your choice)
1 cup Basil Aioli Sauce (see recipe below)

1. Using a biscuit cutter, about the same diameter as the tomatoes, cut bread rounds. Put plastic wrap between layers and store in freezer until ready to assemble.

2. Bring water to a rolling boil in a large pot. Prepare a large bowl of ice water, set it aside. Using a paring knife, score "x" on the smooth side of tomatoes. Gently put tomatoes in boiling water; be careful of splashing hot water! Blanch tomatoes for 30 seconds or so until you see tomato skin begin to peel. Do not over blanch.

3. Using a slotted spoon, take tomatoes out and immediately plunge tomatoes in ice water to stop from cooking. Peel the skin using a paring knife, if necessary.

4. Slice the tomatoes (one tomato yields about 4 nice, thick slices) and let drain on several layers of paper towels. Cover and store in fridge until ready to assemble (can be prepped a day head).

5. When ready to assemble, lay frozen bread rounds, spoon or pipe sauce on, pat excess juice out of tomato slices with paper towels before laying on top of sauce, then top it with second bread round. Finish assembling and cover well with plastic until serving time.


Basil Aioli Sauce:

3/4 cup mayonnaise
1/4 cup sour cream (or softened cream cheese)
1/4 cup finely chopped fresh basil
1 tablespoon fresh lemon juice
1 tablespoon prepared horseradish
1 teaspoon grated garlic
1 teaspoon grated lemon peel
1/8 teaspoon salt, or more

Combine all ingredients in a small bowl, season well with salt. Set aside or refrigerate in a plastic storage bag until ready to assemble sandwiches.

Make Ahead Tips:

Up to two weeks prior: Cut bread rounds, cover well and freeze

Up to 3 days prior: Make Basil Aioli, store in zip lock bag, refrigerate

1 Day before: blanch tomatoes, peel skins, slice, cover well and store in refrigerator.

4 hours prior to event: begin assembling sandwiches, cover well with plastic wrap; can be stored in refrigerator or room temperature.

1.14.2011

Blackened Salmon Sandwich


After one full year of blogging, I am realizing how I can best use this blog to help others and which direction it should go. I get frequent emails requesting how-to's on recipe conversions and cooking tips.

So from now on, I would like to focus on sharing tips on how to cook in a large scale, along with tasty recipes which can be made ahead. With each recipe, you will find "Make Ahead" tips that can be used for a big gathering.

Blackened salmon is always a hit at the Wednesday Noon Service lunches. Here is how we prepare delicious blackened salmon fillets for a crowd.

Thaw salmon fillets completely if frozen. Pat dry the filets with paper towels and sprinkle your favorite rub or this dry rub on the meat. Heat the griddle or cast iron frying pan until smoking point. Drizzle vegetable oil and sear and blacked both sides of fillets.

See how the exterior has a good blackened crust but the center is still raw? When you need to serve hot foods all at the same time, par-cooking is the key. Par-cooked salmon can sit room temperature up to one hour before finish cooking in the oven.

15 minutes before serving time, breads and fixin's are readied. Use lettuce as a barrier to sauces or juicy tomatoes to keep the bread from getting soggy.

Minutes before serving, hot salmon is placed on the sandwich and drizzled with extra sauce. Notice how we use plastic storage bag to pipe the sauce : quick and messy free!


Blackened Salmon Sandwich

Boneless, skinless salmon fillets, 4 to 5 oz each per person
Your favorite dry rub or click here for The Best Dry Rub recipe
1/2 stick of melted butter
2 Tablespoon vegetable oil for the pan

For sandwiches: Add anything that inspires you.
Hoagie Buns
Iceberg lettuce or your favorite greens
Tomato slices
Avocado slices
Your favorite aioli or click here for Pesto Aioli
Pat dry the fillets well with paper towel.

Brush salmon fillets on both sides with melted butter, and sprinkle evenly with the dry rub mixture. Let sit for 10-15 minutes.

Heat a large heavy skillet over medium-high heat (nearly smoking point), drizzle 2 tablespoon of vegetable oil, and cook salmon fillets until blackened, about one minute. Don't move the fillets until a good crust is formed. Turn fillets, blackened the other side.

Put fillets on a jelly roll pan or any baking sheet with a raised edges, loosely cover until ready to bake. Can be done up up to one hour prior to baking. Remove cover before baking.

Preheat the oven to 375 degrees F.

15 Minutes prior to serving, place sliced bread/hoagie bun and top lettuce, sliced tomatoes, avocado and drizzle sauce.

10-15 minutes before serving, bake salmon until cooked through (Internal temp. 140 degrees F) about 8 -12 minutes, depending on the size.

Make-Ahead:

Days/Weeks ahead : Make Dry Rub
Up to 4 days ahead: Make Aioli, store in plastic ziplock baggie
Up to 4 hours ahead: Thaw, if frozen, salmon fillets; Thinly slice lettuce, tomatoes, avocado can be sliced and dipped in lime juice, cover with plastic food wrap.
Up to 1 hour ahead: Blacken salmon fillets ready to bake


7.02.2010

Venison Burger


If you are looking for lean, organic meat, Venison is a great source. It is full of protein, zinc, and iron and I was absolutely thrilled when Andy( IPC's long time church member) offered me ten pounds of venison for our Wednesday Noon Service Lunch. For a foodie, great chunk of meat over diamonds, any day!

To keep this lean meat moist, I started with panade (milk and bread mixture) and added a bit of processed raw bacon.

Adding fresh garlic, caramelized onion, and Italian parsley completely took out any gamey taste. Even after searing and baking, it was incredibly moist and full of wonderful flavor. Melted pepper jack finished off the burger with a nice kick.


I took one piece home and left it in the fridge for my husband before I left on the mission trip with the kids. When I returned home, on our kitchen white board was this: "Venison burger, EXCELLENT!!" No famed food critic could have given me a better review.


Top photo venison patty was grilled, this one pan seared.

Venison Burger

Panade Mixture:
2 slices of white bread, torn to pieces
1/4 cup buttermilk

1 small onion, finely chopped, sauteed with 1 Tablespoon of olive oil for 5 minutes

4 slices of bacon, processed until finely chopped
2 cloves garlic, finely grated
2 tablespoon chopped fresh parsley
1 Tbsp. Worcestershire Sauce
2 Tbsp. Soy Sauce
1 Egg
4 teaspoon chopped fresh oregano or 1 teaspoon dried
1 pound ground venison
Freshly Ground Pepper to taste

Lettuce
Tomato Slices
4 Kaiser Rolls
4 Cooked bacon slices
4 Slices of Pepper jack

1. In a large bowl, make panade by combining pieces of white bread and butter milk together making into a paste. Add cooked onion and rest of the ingredients, gently combining and mixing together.
2. Divide them into fourths and make four large patties. Heat largest frying pan to medium-high until smoking point. Put a tablespoon of olive oil, swirl the oil to coat and put venison burger patties to sear, forming a dark crust on both sides.
3. You can reduce the heat slightly and finish cooking until meat thermometer registers 145 degrees for medium doneness or 160 degrees F. for well done. Or finish cooking in 375 degrees F. oven (if making larger amount), 10-12 minutes. Top pepper jack cheese slices on burgers and cook 30 seconds more for cheese to melt.
4. Assemble burgers and serve with your favorite topping.

6.16.2010

Fried Green Tomato BLT with Wasabi-Basil Mayo


Back several years ago I had a terrible restaurant fever. It was pretty bad. I had a great opportunity to open a restaurant with a friend and was so determined to do it.

But God changed my heart and made me realize that it wasn't the right season in my life to marry a restaurant. I was already married to a wonderful man anyway and had four beautiful, young children. I am grateful to be available to my church and home families now, instead of being a full-time "restrauranteur".

Anyway, this was one of the dishes I had in mind to include in the menu. The epitome of Southern Cuisine with a bit of Asian flair. They don't call me Sneaky Asian Cook for nothin'.


Slice green tomatoes 1/4 inch thick and lightly salt them and let sit for 5-10 minutes to draw some liquid out. Dry well with paper towels before flouring. This extra step keeps coating extra crunchy without access water oozing after frying.

For cornmeal dredge, I added panko bread crumbs. I love panko. If you have never tried using Panko (click here for my favorite brand), please give it a try, you will fall in love with it, too. Everything you fry will be light and wonderful.

Typically tomatoes were fried in bacon fat , because that was most available back then. So I gave it a try. But after taste testing the ones fried in vegetable oil versus bacon fat, the ones fried in vegetable oil had cleaner taste. Bacon fat flavor was too overpowering and masked the fresh, tart taste of green tomatoes.

To balance the taste of fried food and to give it a little kick, I made Wasasbi Mayo. Wasabi alone was a little bland and a bit of garlic, fresh lemon juice and fresh basil added great flavor to a beautiful green condiment to these fried green tomatoes.

Fried Green Tomatoes

4 large green tomatoes

2 eggs

1/2 cup buttermilk

1 cup all-purpose flour

1/2 cup yellow cornmeal

1/2 cup Panko bread crumbs

2 teaspoons coarse kosher salt, for sprinkling on sliced tomatoes

3 teaspoon Dry Rub, divided.
1 quart of vegetable oil

Instruction:

Slice tomatoes 1/4 inch thick. You will get four, nice slices per tomato. Lightly salt the slices and let sit on a wire rack for 5-10 minutes. Lightly press paper towels to dry them.

Whisk eggs and buttermilk together in first flat, container.


Scoop flour onto a second bowl.


Mix cornmeal, panko bread crumbs on another plate. Add 1 teaspoon of Dry Rub mixture in each containers. If you don’t have it available, substitute ½ teaspoon of kosher salt and ½ teaspoon of pepper in each mixture.


Dip tomatoes into flour to coat. Then dip the tomatoes into buttermilk and egg mixture. Dredge in breadcrumbs to completely coat. Place them on wire rack until ready to fry.

In a large cast iron skillet, pour vegetable oil (enough so that there is 1/2 inch of oil in the pan) and heat over a medium heat or until oil reaches 350 degrees F. Place tomatoes into the frying pan in batches of 4 or 5, depending on the size of your skillet. Do not crowd the tomatoes, they should not touch each other. When the tomatoes are browned, flip and fry them on the other side. Drain them on wire rack. Serve with Wasabi-Basil Mayo.


For BLT, add crispy bacon and lettuce.


Wasabi-Basil Mayo


1/2 cup Hellmann's Mayo

1/4 cup sour cream

1 Tablespoon already prepared wasabi paste, more if you want HOT

1 Tablespoon fresh lemon juice

2 Tablespoon minced fresh basil

1 large clove of garlic, grated

Salt and freshly ground pepper to taste


In a food processor, pulse until all ingredients are smooth. About 1 minutes. Salt and pepper to taste.

6.02.2010

Monte Cristo Sandwich


A big thank you to Debbie Galle Frost of Life is Good Farm , who suggested this wonderful sandwich idea for our Wednesday Service Lunch! It was wildly popular with the lunch crowd today and several people had to wait until I could make more!

Monte Cristo Sandwich is a variation of Croque Monsieur, a French grilled cheese made with Gruyere and lean ham dated back in 1910. In the 30's, many American cookbooks featured this sandwich under names like French Toasted Cheese Sandwich or just French Sandwich. But in the 60's, Disneyland in Anaheim, California popularized eating of this sandwich.

There are so many variations of this sandwich, but most contain ham, turkey, and cheese. Then the sandwich is dipped in egg batter and deep fried or grilled. In this variation, ham and cheddar are on first layer and turkey and Swiss cheese on the second. Wheat bread slices held up better than white bread after frying.


For crispiest coating, use icy cold water and add corn starch in the batter.


Rather than dipping the sandwiches in the batter, smear the thick batter with gloved hands onto the sandwiches for better control of how much batter is put on.


I was told that powder sugar is a must, and so is the jelly. Strange as these sweet suggestions may sound, they really did enhance the flavor of this sandwich.

Monte Cristo Sandwich
Makes 6 very large sandwiches

18 slices whole wheat bread
6 slices cooked turkey
6 slices cooked ham
6 slices American cheese
6 slices Swiss cheese

Batter
1 egg
1 1/2 cup ice water
1 teaspoon salt
2 teaspoon sugar
2 cups flour
1/2 cup of corn starch
1 tablespoon baking powder
Vegetable oil (for deep frying)

Place turkey and Swiss cheese on one slice of bread and ham and American cheese on another slice of bread. Place third slice in-between and secure the double-decker sandwich in the corners with tooth picks.

Place egg in mixing bowl, add water and beat together. Add salt, sugar, flour, and baking powder. Beat batter until smooth.

Using gloved hands, smear batter onto sandwiches and carefully cover all the sides and surface.

Carefully place in hot oil, 375 degrees F and fry until golden. When sandwich has turned a warm gold color remove from hot oil and place on a wire rack. Let cool for a few minutes before removing the tooth picks.

Before serving slice into halves or fourths and sprinkle with powder sugar. Serve with Strawberry or Raspberry jam.