
At IPC kitchen, I train many young people to cook and work. It is the nature of food service industry, as people come and stay for a while, then move onto bigger things in life. I have trained a dozen or more prep staff in last three years, and noticed a few basic things about cooking and working in a commercial kitchen.
Here are some that might be helpful to you.
1. Use your hands

Whether you are separating eggs,

mixing meatloaf,

or sauces, your hands are the best utensils you can ever use.
2. Use the thermometer: There is nothing more frustrating than having a good piece of meat overcooked or scorching the food in a overheated frying oil. Find out optimal internal temperatures of varying meats and post it where it is easily accessible. And not only the meats, you can temp the following for doneness.
Bread- 190-200 degrees F
Custardd/Creme Brûlée/Souffle/Quiche - 160 degrees F


3. Keep ingredients close to you. While you are prepping, each time you reach for something far or have to take a step to get it, you are wasting a motion. Multiply wasted motion times 10 and you added 5 or more minutes to each prep hour.


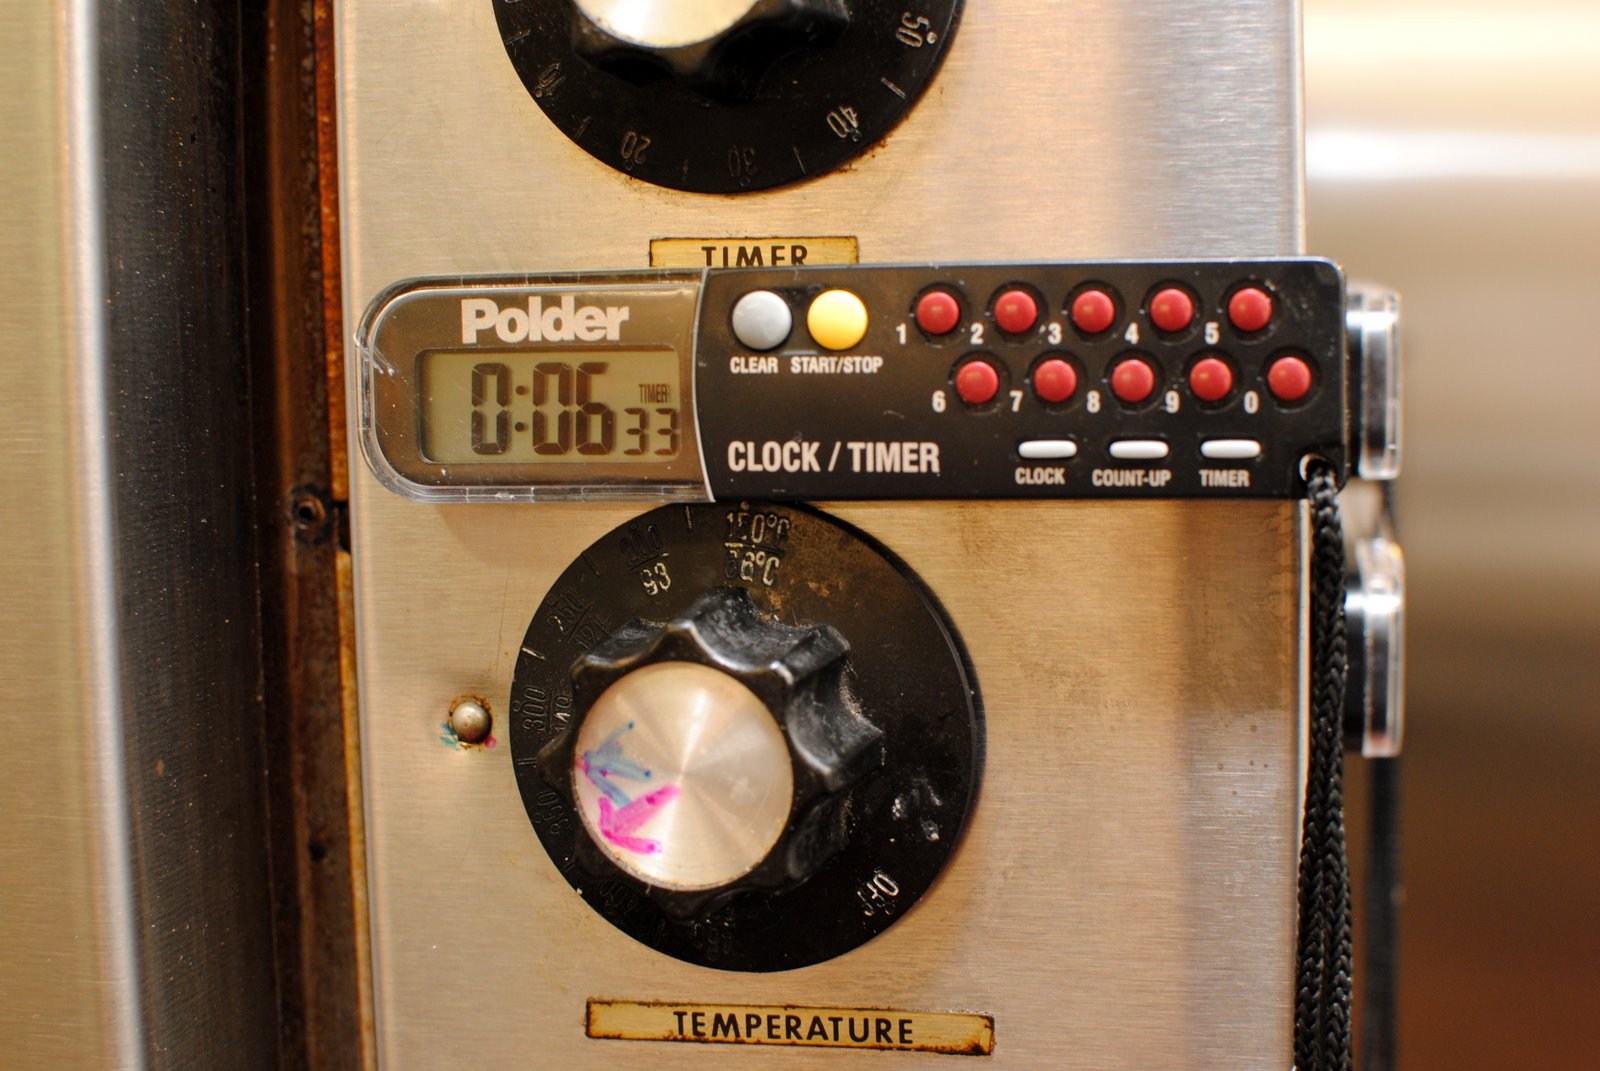
5. Use the timer: get one that is obnoxiously loud and must be turned off manually. This Polder timer is magnetic and can even be worn around your neck!

7. Clean as you go. You probably already know this. When you are cooking in large scale, taking time to clean and re-orient yourself is a must.

8. Freeze: find out which foods can be frozen ahead without compromising on flavor and texture. Incorporate these foods into your menu and you will have more time to be creative on the day of event.


9. Prep ahead : things which can be chopped, cooked, or peeled should be done a day or two ahead . The day event should be last minute cooking or assembling day.


10. And have fun sharing! Share your recipes, time, and love for cooking with others. There is something so special about working and tasting your labor of love together.


Here are some that might be helpful to you.
1. Use your hands

Whether you are separating eggs,

mixing meatloaf,

or sauces, your hands are the best utensils you can ever use.
2. Use the thermometer: There is nothing more frustrating than having a good piece of meat overcooked or scorching the food in a overheated frying oil. Find out optimal internal temperatures of varying meats and post it where it is easily accessible. And not only the meats, you can temp the following for doneness.
Bread- 190-200 degrees F
Custardd/Creme Brûlée/Souffle/Quiche - 160 degrees F


3. Keep ingredients close to you. While you are prepping, each time you reach for something far or have to take a step to get it, you are wasting a motion. Multiply wasted motion times 10 and you added 5 or more minutes to each prep hour.


4. Store food in Ziplock bags. Yes, even sauces. When you are cooking in large volume, this will save a lot of refrigerator space plus no storage containers to wash after events.


Make sure you put bagged liquid in a leak-proof container when you are refrigerating, so you will not have a heap of mess to clean up later.

Make a collar by turning the baggie top edge over to keep sealing areas clean.
5. Use the timer: get one that is obnoxiously loud and must be turned off manually. This Polder timer is magnetic and can even be worn around your neck!
6. Weigh your baking ingredients. This is the key to consistent result in baking! It is much more reliable to measure ingredients by weight, instead of volume.


7. Clean as you go. You probably already know this. When you are cooking in large scale, taking time to clean and re-orient yourself is a must.

8. Freeze: find out which foods can be frozen ahead without compromising on flavor and texture. Incorporate these foods into your menu and you will have more time to be creative on the day of event.


9. Prep ahead : things which can be chopped, cooked, or peeled should be done a day or two ahead . The day event should be last minute cooking or assembling day.


Well, I hope these tips were helpful to you. I will put together another post in the future sharing some more shortcuts and tips I have learned along the way.
Good tips, thanks for sharing!!
ReplyDeleteI always separate my eggs this way - it really makes it easier and more efficient doesn't it?
ReplyDeleteThese are some great tips! Thank you very much for sharing with us!
ReplyDeleteHey Kay! These are great tips, and I think I use most of them, except the thermometer. I think that's okay though, as I'm not big on meat?!
ReplyDeletep.s. Restaurants and cooking are the 'bigger, better' thing for me (smile)...!
Wonderful tips thank you!
ReplyDeleteI agree, great tips! Makes me want to come and learn from you in the kitchen. . .thankfully I can do that through your blog to an extent. =)
ReplyDeleteGreat tips! I always tell people to use their hands!
ReplyDeleteDidn't my daughter tell you? That I am the cheapest mom in town and I also wash out my freezer bags? Sigh...otherwise, these tips are great!! :)
ReplyDeleteI LOVE learning from you! You have transformed my thinking about meal prep. Now if I can just implement it....hmmm. Thank you for putting all of your tips in one spot for me.
ReplyDeleteFab tips! Thanks for sharing!
ReplyDeletereally helpful :)
ReplyDeleteNice tips thanks! :)
ReplyDeletethese are some truly useful and valuable tips, kay! i always separate my eggs with my hands--nothing else works so well. also, my baking took a drastic change for the better when i got a kitchen scale. :)
ReplyDeleteFrom one ex-caterer to another - well said!!!!
ReplyDeleteThank you my dear friends for your kind comments!
ReplyDeleteGreat tips! My Grandmothers always insisted on using your hands so that you knew how the food was supposed to feel. Best advice they ever gave me. I like the idea of incorporating food that freezes well into the menu--I tend to forget that one & end up running around like a crazy woman trying to get everything done.
ReplyDeleteThese are great tips, Thank You so much!
ReplyDeleteCheers for a very good post. You have given me satisfaction to every post i read here. Hope you keep on sharing relevant information to all your readers.
ReplyDeleteGreat to connect with you. What beautiful catering work you do in Jacksonville! Looking forward to getting to know you better via your blog. :)
DeleteI'm just starting out - very small. Baking items for a local farmers' market and doing some boxed lunches, hopefully (about to bid on a job!). When freezing bread, do you find that you get the best results when freezing the dough after the first rise or after the second rise? Also, can muffin or scone batter be made a day or two before baking off? I'm DEVOURING your blogs -- such great information and lovely pictures!! Many thanks!
ReplyDeleteHi, Hope! That depends on how much time you have before you head out to farmers market. If you freeze the dough (you can freeze after first rise), you will still need to bring the dough to room temperature and dough rise before baking, which could take a lot of time before you go to the market.
DeleteIf you are pinching for time, I think you can bake the bread completely a few days before, cool completely and saran wrap and foil the finished loaves without compromising taste too much.
For quick breads, I usually measure out all the ingredients (wet and dry ingredients separately, and labeled), my muffin pans lined with paper, this can be done days ahead, then bake on the day of event. Scones dough can be made and shaped (usually cutting the discs into 6ths or more), separated and frozen. Then on the day, brush with buttermilk/egg whites (do not thaw before baking) then sprinkle with sugar and bake.
Any questions you may have please email me at thechurchcook@gmail.com :)