5.30.2012

Apple Stack Cake with Miss Sophie


Hey, guys!  It's Wednesday and Miss Sophie has an awesome apple cake recipe for you.  And it was so fun to make something I have never made before and photograph it.   This Appalachian Apple Stack Cake is good; not just your average, sort of "good", but down-to-earth, "I-love-my-mema" kind of good.  

The filling is made with dried apples and cooked with brown sugar, molasses and spices.  

Click to read more  about this beautiful cake and its intriguing history behind it from Miss Sophie on Savannah Morning News.

Print This Recipe!


Apple Stack Cake
Recipe of Miss Sophie with a little modification
Used with permission

Dried Apple filling:
3 (6 ounce) packages dried sliced apples, coarsely chopped
6 cups water
1 cup firmly packed brown sugar
1 teaspoon ground cinnamon
½ teaspoon ground allspice
½ teaspoon ground nutmeg
1 tablespoon lemon zest
2 tablespoon fresh lemon juice

Cake:
1/3 cup vegetable shortening
1/2 cup sugar
1 large egg
4 cups all-purpose flour
1 teaspoon baking powder
1 teaspoon baking soda
1 teaspoon salt
1/2 cup buttermilk
1/2 cup molasses
2 1/2 teaspoons sugar for sprinkling

Preparation

For dried apple filling:
Stir together apples and 6 cups water in a large saucepan or Dutch oven. Bring to a boil; reduce heat, and simmer 30 minutes or until tender. Stir in sugar, spices, lemon zest, and lemon juice. Return mixture to a boil; reduce heat, and simmer, stirring occasionally, 10 to 15 minutes or until most of liquid has evaporated. Cool completely.

For the cake:
Beat shortening at medium speed with an electric mixer 2 minutes or until creamy. Gradually add 1/2 cup sugar, beating 5 to 7 minutes. Add egg, beating until yellow disappears.

Combine flour and next 3 ingredients. Stir together buttermilk and molasses in a large measuring cup. Gradually add flour mixture to shortening mixture alternately with buttermilk mixture, beginning and ending with flour mixture; beat until blended. The dough will be like cookie dough.

Divide dough into 5 equal portions It is easier to roll out the dough into a disc with a rolling pin to fit the size of your pan than to press into pan.  Place each thin disc in a 9-inch greased and floured cake pan or cast-iron skillet, and firmly press the edge of the dough with floured fingers into the edge of the pan. Prick dough several times with a fork. Sprinkle each layer evenly with 1/2 teaspoon sugar. Repeat with remaining dough.

Bake at 400° for 10 minutes or until golden brown.  Three 9-inch pans fit in a oven rack.  Repeat procedure as needed to bake in pans. Remove layers from pans; cool completely on wire racks. The cake will be the texture of dried biscuit.

Spread 1 1/2 cups Dried Apple Filling between each layer to within 1/2 inch of edge, beginning and ending with a cake layer. (Save your prettiest cake layer for the top).  Loosely cover cake, and let stand 1 or 2  days at room temperature.

Personal Note: I had my doubts about this cake at first, but after one full day, the cake absorbed the delicious spiced apple filling, and turned it into wonderfully moist and tasty cake.  

5.28.2012

Cherry Hand Pies


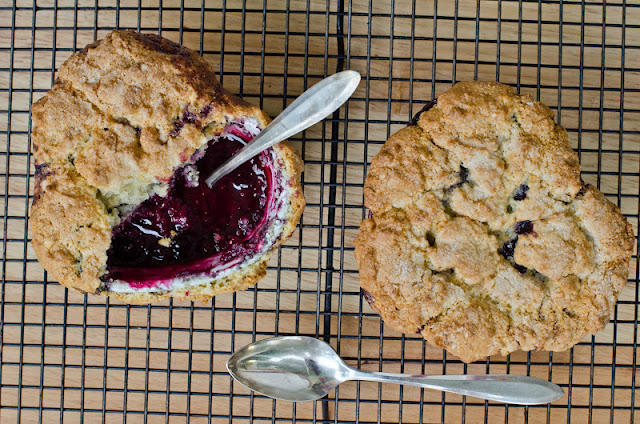
 My family love pies but since I started working in the church kitchen, I rarely spend time making special treats like I used to.  Cobbler's children have no shoes, right?  When I saw frozen cherries at Sam's Club, I wanted to surprise my family  with some cherry hand pies for dessert.  

 Not wanting to spend a lot of time on fillings, I simply tossed the frozen cherries with sugar, lemon zest, tapioca, and for flavoring, almond extract.   

 Brush the tops with egg white and either raw or granulated sugar can be used for sprinkling.

These are also great for making as mini-cherry pies.  

My 8-year old insisted that he'd have one for breakfast next day.  Hey, why not, it sure beats a Pop Tart.   


Print This Recipe!


Cherry Hand Pies
Makes about 8 hand pies
Adapted from Bon Appetite

12 ounces frozen pitted cherries, slightly thawed, coarsely chopped
2 tablespoons tapioca
1/2 cup dried cranberries
1/2 cup granulated sugar, extra for sprinkling
2 tablespoon fresh lemon juice
1 tablespoon lemon zest
1 teaspoon almond extract
1/8 teaspoon table salt


1-double pie crust of your choice, rolled out and chilled well (click here for pie crust recipe)
1 large egg white
1 tablespoon water

Preheat oven to 375°F.

Toss together in a bowl the first 8 ingredients.  Refrigerate while working with the dough.

Whisk egg white and 1 tablespoon water in another small bowl for egg wash, set aside.

Take the chilled crust, roll out to a large rectangular shape about 18" x 16".  Use a pie crust cutter and a clean ruler, cut the crust in smaller rectangles about 4x5, or so.  Chill the pastry and work with one rectangle at a time.

Using your finger or a pastry brush, apply the egg white mixture on the edges of the small rectangles.  Scoop a heaping tablespoon of filling mixture, fold over the dough, forming a packet.  Seal the edges well by using a fork to crimp the edges.  Cut two or three slits on top with a paring knife.  Repeat the process with remaining pastry and filling.  Makes about 8 packets.  At this point, these can be frozen for later use.

Line two baking sheets with two sheets of parchment paper. Place the pies, fits about  4 on each pan.  Brush tops with egg white mixture, then sprinkle with granulated or raw sugar is fine, too.  Bake until tops are golden brown and filling oozes out, about 30 minutes.  Transfer to wire rack and cool before serving.


5.25.2012

Simple Garlic Pickles


It's about time I share this super garlic pickle recipe with you.  I tried to post it before, but as you know, pickle are not so photogenic.  My point & shoot camera plus my lack of photography skill a year or two ago didn't help much to improve the look either.  But now, a proper introduction is in order for these fabulous (yes, pickles can be quite fabulous) garlicky pickles with a delightful kick.

Drain all the pickle juice.  After slicing the pickles, put them back in the jar, then add Tabasco sauce, garlic cloves, and sugar.  Easy, wasn't it?  After 2-3 days in the refrigerator, it is ready to serve.  


Simple Garlic Pickles 

1 jar    one gallon, whole kosher dill pickles, regular sour kind
1/2 C  Tabasco sauce
8-10   whole garlic cloves, peeled
3 C     granulated Sugar

Completely drain and discard all the pickle juice. Cut pickles into 1-inch slices. Put sliced pickles back into the empty jar then add the remaining ingredients.

Screw on the jar lid very TIGHTLY. Turn jar upside down and refrigerate; pickle juice will exude and dissolve the sugar. Just incase the pickle juice leaks, put a small pan under.  

Refrigerate pickles 2-3 days, turning the jar once or twice a day.  Now it's ready to serve. 

Keeps crunchy for about 2-3 weeks. 

5.23.2012

Working Hands


“Where the spirit does not work with the hand there is no art” - Leonardo da Vinci


There is so much beauty in working hands.  I love to capture the images of hands as they touch, slice, and hold, and share foods.  

I think hands are one of many God's exceptional gifts to mankind.  

"She opens her arms to the poor and extends her hands to the needy."  Proverbs 31:20

May your hands be instruments of blessing today.  

5.21.2012

Mixed Berry Cobbler


This Mixed Berry Cobbler is so simple that in our church kitchen, we can make 6 full-size pans for 300 people in less than 2 hours, start to finish.  Whenever we have access fruit such as strawberries, blueberries, and raspberries, we freeze them to add to this cobbler, which adds just the right amount of sweet and tartness.    

Combination of  frozen mixed berries tossed with sugar, cornstarch or tapioca, and a splash of fresh lemon juice make the yummiest filling.  Cornmeal topping finishes this cobbler with a serious crunch, balancing the sweet-tartness of the cobbler. 


Vanilla ice cream recommended but not needed for this beautiful cobbler. 

Print This Recipe!

Mixed Berry Cobbler
Serves 8

Filling
1/3 cup granulated sugar
1 tablespoon cornstarch or tapioca
1/8 teaspoon table salt
6 cups frozen mixed berries (30 ounces)
1 1/2 teaspoons grated lemon zest
1 tablespoon lemon juice
1 teaspoon vanilla extract

Biscuit Topping
1 cup unbleached all-purpose flour (5 ounces)
2 tablespoons cornmeal , stone-ground
1/4 cup granulated sugar, plus more for sprinkling
2 teaspoons baking powder
1/4 teaspoon baking soda
1/4 teaspoon table salt
4 tablespoons unsalted butter (1/2 stick), melted
1/3 cup buttermilk
1/2 teaspoon vanilla extract

Optional: Serve with vanilla ice cream


1. Adjust oven rack to lower-middle position and heat oven to 375 degrees.

2. For the filling: Stir sugar, cornstarch or tapioca, and salt together in large bowl. Add frozen berries and mix gently with rubber spatula until evenly coated; add lemon zest and juice and mix to combine. Transfer berry mixture to 9-inch greased glass pie pan, place pie pan on rimmed baking sheet, and bake until filling is hot  about 15-20 minutes.

 3. For the biscuit topping: Whisk flour, cornmeal, 1/4 cup sugar, baking powder, baking soda, and salt in large bowl to combine. Whisk melted butter, buttermilk, and vanilla in small bowl, set aside.  Minutes before berries come out of the oven, add wet ingredients to dry ingredients; stir with rubber spatula until just combined and no dry pockets remain.

 4. To assemble and bake cobbler: Remove berries from oven.  Pinch off 8 equal-sized pieces biscuit dough and place on hot berry filling, spacing them equally. Sprinkle each mound of dough with extra sugar. Bake until filling is bubbling and biscuits are golden brown on top and cooked through, 15 to 18 minutes. Cool cobbler on wire rack 20 minutes and serve with vanilla ice cream.

Note: Multiplying the filling recipe  by 30 would be way too much.  Here is the modified recipe for large volume baking for this recipe.  

To Serve 275-300

For Filling:
In 6-full size disposable steam pans as shown, spray with oil spray, and equally divide the following frozen fruit

5 bags       48 oz Triple Berry Blend (15 lbs)
2 bags      5 lb Frozen Strawberries (10 lbs.)
2 bags       48 oz Frozen Blueberries (6 lbs)

then add the following to each pan and toss well with gloved hands:

1/2 cup       granulated sugar to each pan, extra for sprinkling
1/2 cup       corn starch, or tapioca
1/4 cup       lemon juice
2 Tablespoon Vanilla extract

For Biscuit Topping:
Multiply the biscuit  topping recipe x30

To save time, we measure out the ingredients ahead, wet & dry separately, and store until ready to bake.

Increase baking time: for filling 30 minutes, then with biscuit topping 35-45 minutes more until crust is golden brown.


5.16.2012

Pappa al Pomodoro with Miss Sophie


It's hard to believe it's mid-May and we are enjoying the fruit of our labor.  And would my Northern friends be jealous to see that I'm already harvesting vine ripe tomatoes in my garden, my mom's garden?   And Miss Sophie's Pappa al Pomodoro recipe couldn't come at a better time.  Let's read about how she procured this simple but beautiful recipe while on her recent vacation.

Steve, the girls (our dogs) and I recently returned from our annual week vacation at Seabrook Island on John’s Island, S.C. We’ve rented the same condominium at Pelican’s Watch for the past three years.......  


Ever so tenderly my mom is growing these beautiful tomatoes. green onions, and herbs.


Print This Recipe!

Pappa al Pomodoro
Recipe of Wild Olive Restaurant, Seabrook Island, SC
Used with permission

Serves 6-8

3 or 4 pounds of really ripe tomatoes
1 pound of blanched local spring onions
2-3 garlic cloves minced
1 1/2 cups of stale bread
1/2 cup of fresh basil
1 tsp. chopped fresh thyme
1/2 cup extra-virgin olive oil
1/2 cup water
Salt and Pepper to taste


Puree tomatoes and onions briefly then add everything else and pulse until incorporated but leave it chunky. Let sit for at least 30 minutes. (Serve cold or warm)

5.14.2012

Pineapple-Banana Bread


(my hand model is my sweet girl who turns 17 today. Happy Birthday, girlie!)

Every Friday, I co-teach 4th-6th graders at a Homeschool Co-Op. This semester we are doing a unit study on World Geography.  For the cultural part of this study, I've had a wonderful time choosing a craft, game, or food about the particular country we are learning about each week.   

Last Friday was Oceania.  So, along with a Australian Dot Painting craft my co-teacher chose, I baked this Pineapple-Banana bread for the children to taste.  I don't normally go wild about banana breads, but this one was totally blog-worthy.      

 Here are some other projects the kids have done previous weeks:  Rainbow People (South Africa)

Faberge Eggs (Russia)


Pineapple-Banana Bread
Makes 2 generous loaves

3 cups all-purpose unbleached flour (15 oz)
2 cups granulated sugar (14 oz)
1 teaspoon table salt
1 teaspoon baking soda
1 teaspoon ground cinnamon
3 eggs
1 1/4 cups vegetable oil
2 teaspoons vanilla extract
1 (8 ounce) can crushed pineapple, undrained
2 cups mashed ripe bananas
1 cup toasted walnuts, chopped (optional)

 1. In a medium bowl, combine the flour, salt, baking soda and cinnamon, set aside. In a large bowl, beat the eggs, oil, sugar, and vanilla until creamy; stir in pineapple and bananas. With a rubber spatula,fold in the dry ingredients just until moistened.  Add walnuts, if using.

 2. Pour into two greased 8-in. x 4-in. x 2-in. loaf pans.

 3. Bake at 350 degrees F for 60-65 minutes or until a toothpick comes out clean. Cool for 10 minutes before removing from pans to wire racks.

Note: for more consistent baking, try using a scale.  Here is the handy baking conversion chart.  And a link to simple digital food scales.  

5.10.2012

Thankful Thursday

This early morning, as I hurriedly drive back home from dropping my youngest off to carpool stop, I realize how much beauty is around me.  And too often, I am too hurried to notice it.  


Take a deep breath.  Stop.  Look around you.  And open your heart to see what beauty surrounds you today, right where you are.  


5.08.2012

Last Photo Shoot - Picnic Lunch for Two

Helene and Clare demonstrated how they set up a food shot and work it.  Watching these pros setting up and styling helped me tremendously.  And this what I came up with : Picnic lunch for two.

I learned so much this weekend and the creativity and energy of these two women and 10 other attendees really recharged me.  Of course on the drive way home from Charleston to Savannah, I was stopping at every antique stores hunting for props.  Oh, boy, my husband will love me more lugging in all the stuff into the house.....

It was an incredible weekend learning from Helene, Clare, and the attendees.  But most of all, I think this is a beginning of a wonderful friendship.


5.05.2012

With Helene and Clare-Day 2


Day 2 of Food Photography Workshop with Helene and Clare included an early visit to Charleston Farmer's Market.  And our assignment was to be inspired for our brunch photo shoot.  

 With beautiful produce like these, it's not very hard to be inspired.  


And here are my shots.  Join me for some brunch.......


5.04.2012

Food Photography Workshop with Helene and Clare-Day 1

Well, guess where I am!  I am spending this weekend with Helene and Clare at a food photography and styling workshop in Charleston, South Carolina.   And yes, this tops as THE dream vacation for me learning from these pros.

Day one photo shoot consisted of antipasto and dessert.  Beyond their excellent teaching and coaching, I truly sensed their genuine passion for their work and for their students.

Choosing from amazing collection of props from both Clare and Helene totally inspired me.  Talk about feeling giddy like a school girl in a candy shop!

Can't wait to see what next two days will be like.  Tomorrow....Charleston Farmer's Market.

Do you want to attend one of their workshop?  I assure you, it will transform the way you take food photos.  Click here for their workshop schedule.

Helen Dujardin

Clare Barboza

5.02.2012

That's a Wrap! with Miss Sophie


Miss Sophie has some fabulous wrap recipes this week on Savannah Morning News.  And while taking photos, I had about six of these babies, may be seven.  One of the greatest benefits of taking food photos is that I get to eat the subject when done.

The sandwich wrap has become the way to eat a sandwich. This phenomena isn’t really new, the name just is. For years we’ve been eating tacos, burritos, crepes, gyros and egg rolls, all of which are wraps.   Click here to read more.......